


Innovation is not always about inventing an entirely new product. Sometimes it means taking a confusing category and making it easier for ordinary people to understand.
CBD topicals provide an interesting example. A shopper may encounter creams, salves, balms, gels, ointments, lotions, roll-ons, and sticks, all displayed within the same section of a store or website. Some products advertise a few hundred milligrams of CBD, while others display numbers in the thousands. One label emphasizes cooling ingredients, another highlights broad-spectrum hemp, and a third relies on phrases such as “maximum strength” without clearly explaining what that means.
Each product may make sense when viewed individually. The confusion appears when consumers try to compare them. This is where thoughtful product design becomes more than attractive packaging. Good design should help someone understand what a product is, how it differs from nearby options, and whether it fits the intended use.
Begin With the Decision a Customer Is Trying to Make
Product creators naturally think about formulas, manufacturing, sourcing, and branding. Customers usually begin somewhere else. They have a practical question they want the product to answer.
With CBD topicals, that question may be about texture. Should they buy a heavy balm for a small area or a cream that spreads more easily? They may be comparing warming and cooling sensations, looking for a THC-free formula, or trying to understand whether a 5,000mg product is substantially different from a 1,000mg product.
A label designed around internal company language can miss these concerns completely. The manufacturer may be proud of a proprietary botanical complex, but the customer still wants to know whether the product contains menthol and will make the skin feel cold.
The most successful consumer design begins by identifying these ordinary questions and answering them clearly. That does not require covering every detail on the front label. It requires creating a sensible information hierarchy so the shopper knows where to look next.
Product Names Need to Match the Experience
Words such as cream, balm, salve, and gel may sound interchangeable, but they suggest different textures and application experiences. A traditional salve is generally made with oils and waxes, giving it a heavier consistency. A cream normally combines water and oils in an emulsion, allowing it to spread more easily. Gels are often lighter, while roll-ons and sticks are designed to reduce contact with the hands.
Problems arise when naming becomes purely promotional. A brand may call a product a balm because the word sounds natural and concentrated, even if the product feels more like a lotion. Another company may use “gel” to make a conventional cream sound faster or more modern.
This does not necessarily make the formula poor, but it creates a gap between expectation and experience. When a customer opens a product and finds something very different from what the name suggested, trust begins to erode.
For innovators studying how this category communicates, this comparison of CBD topical formats and ingredients shows why consumers need to look beyond terms such as salve, cream, balm, and ointment. The article also illustrates how cannabinoid strength, sensory ingredients, and laboratory testing become part of the same purchasing decision.
The larger design lesson applies well beyond CBD: if a product category uses several overlapping names, the packaging should make the practical differences clearer rather than adding another creative term to the pile.
Big Numbers Need Context
Numbers create confidence because they appear objective. A jar that says “5,000mg CBD” seems to provide a concrete piece of information. Yet a number without context can be almost as confusing as a vague marketing claim.
Container size is one missing piece. A four-ounce jar containing 5,000mg of CBD is more concentrated than an eight-ounce jar containing the same total amount. Both can place “5,000mg” prominently on the front, even though the concentration of the finished products is quite different.
Cannabinoid totals create another challenge. A label may advertise 5,500mg of total cannabinoids when the formula actually contains 5,000mg of CBD and 500mg of CBG. Another product may contain 5,500mg of CBD alone. The numbers look similar, but they describe different formulations.
A well-designed label does not merely display the largest defensible number. It explains what the number measures. Listing CBD and additional cannabinoids separately is clearer than presenting one combined total without context. Showing the container size prominently also helps consumers compare products without searching through several sections of a website.
Innovators should ask a simple question: could a reasonable customer interpret this number differently from the way the company intends? If the answer is yes, the design needs another layer of explanation.
Sensory Ingredients Can Overshadow the Main Product
CBD itself does not create the immediate cooling sensation associated with many topical products. That feeling usually comes from menthol, peppermint, camphor, or similar ingredients. Capsaicin and certain botanical compounds can create warmth.
This creates an interesting product-design challenge. Consumers may judge the strength of the product by the intensity of the sensation. A heavily mentholated cream containing a modest amount of CBD may feel more powerful than a highly concentrated CBD cream with no added cooling ingredients.
The sensory experience is real, but it does not measure CBD concentration. Packaging and product descriptions should make the source of that sensation clear rather than allowing customers to assume that a stronger chill means more CBD.
The same principle applies in food, skincare, cleaning products, and personal technology. Immediate feedback can influence how people judge performance even when the feedback does not directly measure the feature being evaluated. Foam does not always mean a cleaner surface. A strong fragrance does not necessarily indicate better skincare. A brighter indicator light does not mean a device is working more effectively.
Good product design respects the difference between what users feel and what the product can reasonably claim.
Transparency Has to Continue Beyond the Package
CBD companies frequently promote third-party laboratory testing, but access to a laboratory report does not automatically create transparency. The report needs to be understandable, current, and connected to the actual product being sold.
A shopper should be able to determine whether the report matches the product name, strength, and batch. A test for a 500mg tincture does not verify a 5,000mg topical simply because both products carry the same brand name.
The document should also make it reasonably clear where the CBD result appears, whether other cannabinoids were detected, and what the THC findings mean. Some reports include contaminant screening, while others provide only a cannabinoid profile. Those are different levels of information and should not be presented as though they are identical.
QR codes can help by connecting physical packaging to digital records, but only when the link goes directly to useful information. Sending a customer to a general laboratory page containing dozens of unexplained files replaces one confusing experience with another.
The best systems reduce the distance between a claim and the evidence supporting it. That could mean a batch-specific QR code, a clearly labeled report, and a brief explanation of how to read the relevant sections.
Compliance Language Should Inform, Not Hide
Regulated and emerging product categories often accumulate disclaimers. Some are legally necessary, while others are added because a company wants to protect itself from every imaginable misunderstanding.
The result can be a wall of tiny text that technically provides information while practically discouraging anyone from reading it.
The FDA’s consumer information about cannabis-derived products discusses concerns including unproven therapeutic claims, potential drug interactions, and unanswered questions about CBD safety. Companies operating in this space need to communicate carefully rather than implying that a topical can diagnose, treat, or cure medical conditions without adequate evidence.
Careful communication does not have to sound evasive. A company can state what is in the product, explain how it is intended to be used, acknowledge the limits of current evidence, and tell consumers when professional medical advice may be appropriate.
Clear limitations can strengthen trust. Customers are more likely to believe a company that explains what its product cannot promise than one that presents every formula as a breakthrough solution.
Design for Comparison, Not Just Conversion
Marketing teams often optimize a product page to keep attention focused on one item. Consumers, however, are usually comparing several options even when only one page is open.
They want to understand strength, size, ingredients, format, cannabinoid type, price, and testing. If this information appears in a different order on every product page, comparison becomes unnecessarily difficult.
A consistent structure can help. Each product page might present total CBD, container size, additional cannabinoids, topical format, sensory ingredients, cannabinoid type, and laboratory results in the same sequence. This allows customers to compare options without learning a new page layout each time.
Brands offering several strengths should explain the difference among them without assuming that the most concentrated formula is automatically best. A beginner may prioritize a lower price and simpler formula. An experienced topical user may deliberately seek a higher concentration. Good design gives both customers a clear path instead of pushing everyone toward the largest number.
Innovation Often Looks Like Removing Confusion
The CBD topical market is not confusing because consumers lack intelligence. It is confusing because brands use overlapping product names, inconsistent potency language, sensory cues, and technical laboratory documents without a shared structure.
That creates an opportunity for better design.
An innovative company can stand out by naming products accurately, separating cannabinoid amounts, providing concentration context, explaining sensory ingredients, connecting each batch to its laboratory results, and presenting limitations in plain language.
None of those changes requires a scientific breakthrough. They require the discipline to look at the product through the customer’s eyes.
The most useful innovations do not always add another ingredient, feature, or marketing phrase. Sometimes they remove the uncertainty that should never have been there in the first place.…

The image of stretching as a rigid, high-impact routine is fading, replaced by a smarter, gentler approach tailored for longevity. Modern seniors are redefining wellness, using targeted techniques to enhance mobility, manage joint pain, and maintain independence. This exploration moves beyond basic flexibility, covering adaptive tools like resistance bands, the safety of chair-assisted poses, and the integration of breathwork. We also delve into how technology-from guided apps to online classes-provides structure and motivation, ensuring that every stretch supports a vibrant, active lifestyle.
1. Morning Mobility Routines to Start the Day

Have you ever woken up feeling like your joints need a full oil change before you can even think about coffee? That familiar morning stiffness happens because synovial fluid, which lubricates your joints, thickens overnight while you rest. A gentle 5-minute stretching routine performed in bed can get that fluid moving again and ease muscle stiffness before your feet even touch the floor.
Start with neck tilts while still lying on your back. Slowly bring your right ear toward your right shoulder, hold for 10 seconds, then return to center. Repeat on the left side. Follow this with shoulder rolls: roll both shoulders forward in slow circles five times, then reverse direction. These two moves target the upper body tension that builds up from sleeping in one position.
Next, move to the edge of the bed for hip flexor stretches. Sit upright with both feet flat on the floor. Extend one leg straight out, keeping the other foot planted, and gently lean forward from your hips. Hold for 10 seconds, then switch legs. This sequence directly addresses the hip flexors that tighten from prolonged sitting and helps with balance improvement throughout the day.
For those with limited mobility, every move has a modified variation. If lying flat causes discomfort, prop yourself up with pillows. If reaching your ear to your shoulder is too far, simply turn your head side to side. The goal is pain-free movement, not perfection. This routine reduces stiffness before getting up, making the transition from bed to standing far safer and more comfortable. It also improves blood circulation, which supports joint mobility and prepares your body for daily living tasks like reaching for a cup or bending to put on socks.
2. Using Resistance Bands for Gentle Support
Instead of relying on heavy weights, resistance bands offer a low-impact way to build strength and flexibility without straining fragile joints. These portable tools provide variable tension, meaning the harder you pull, the more resistance you feel. For seniors, this allows for a gentle exercise approach that adapts naturally to individual strength levels.
Bands are particularly useful for joint mobility work because they encourage smooth, controlled movements rather than jerky motions. They also support balance improvement by allowing you to stabilize your core while stretching. The key is selecting the right type of band for your specific needs and fitness goals.
| Band Type | Best For | Pros | Cons |
|---|---|---|---|
| Flat Bands | General stretching and upper body work | Easy to grip, versatile length, inexpensive | Can roll or slip during use, requires hand strength |
| Loop Bands | Lower body and hip work, balance exercises | Stays in place on legs, great for hip flexors, no handles needed | Limited range for arm stretches, may feel restrictive |
| Tube Bands with Handles | Seated rows, chest openers, guided movement | Comfortable grip, feels like gym equipment, good for posture correction | Handles can be bulky, slightly higher cost |
For beginners, flat bands are often the easiest starting point. Loop bands work wonders for hamstring stretch variations and hip mobility. Tube bands with handles provide extra confidence for those with arthritis or grip issues.
Start with a light resistance level and focus on form over force. Safety cues matter more than how far you can pull. Always check the band for small tears or weak spots before each session, and never stretch a band more than twice its resting length.
Quick-Start Band Routine for Seniors
Begin with a seated row to target the upper back and improve posture. Sit tall on a chair, loop the band around your feet, and hold one end in each hand. Pull your elbows back while squeezing your shoulder blades, then slowly release. This movement supports daily living tasks like reaching overhead or pulling open heavy doors.
Next, try a hamstring stretch lying on your back. Loop a band around the ball of one foot and gently straighten your leg toward the ceiling. Keep your hips on the floor and feel a mild pull along the back of your thigh. This helps with muscle stiffness and improves range of motion for bending to tie shoes.
Finish with a chest opener to counter rounded shoulders. Hold the band behind your back with both hands and slowly lift your arms away from your body. Keep your shoulders relaxed and breathe deeply. This stretch supports breathing techniques and reduces tension in the upper body.
Bands also serve as excellent tools for standing support during balance work. Anchor a loop band to a sturdy chair leg and step into it for gentle side steps. This builds proprioception and gait stability without the fear of falling. The band provides just enough tension to engage your core while keeping you grounded.
Always move slowly and never bounce during band stretches. If you feel sharp pain, stop immediately. For seniors with osteoporosis or chronic condition concerns, consult a physical therapist before starting. The goal is pain relief and active aging, not pushing past your limits.
3. Chair-Assisted Stretching for Balance and Safety
When every stretch feels like a balance challenge, a sturdy chair can become your best ally for staying upright and confident. A chair provides a stable base that allows seniors to focus on flexibility without the fear of toppling over. This approach transforms a simple piece of furniture into a reliable tool for fall prevention and balance improvement.
However, using a chair incorrectly can introduce new risks. Many seniors unknowingly create unsafe conditions by making small but significant errors in their setup. Understanding these common mistakes is the first step toward a safer stretching routine that supports active aging and joint mobility.
Here are the five most common mistakes seniors make when stretching with a chair, along with the reasons they occur and the corrected approach for each:
- Chair sliding on the floor. This happens when the chair lacks rubber grips or the floor is smooth. The movement during a stretch can cause the chair to shift, creating a serious hazard. Always use a chair with rubber tips on the legs or place it against a wall to prevent any sliding.
- Leaning too far forward. Seniors often bend at the waist to increase a stretch, which shifts the center of gravity dangerously. This usually occurs when trying to reach the toes or floor. Instead, keep the back straight and hinge from the hips only as far as comfortable, using the chair seat for support.
- Using an unstable chair. Folding chairs, rolling office chairs, or stools without back support are common culprits. These offer little stability and can tip easily. Always select a sturdy chair with four legs that are planted firmly on the ground and a flat, supportive seat.
- Gripping the chair too tightly. White-knuckling the seat creates tension in the shoulders and neck, which defeats the purpose of a relaxing stretch. This often stems from feeling unsteady. Use a light touch for balance, not for bearing weight, and keep the shoulders relaxed and down.
- Holding the breath. Many seniors unconsciously hold their breath when concentrating on a stretch. This increases blood pressure and creates muscle tension. Always pair each movement with a slow exhale to encourage muscle relaxation and better blood circulation.
To correct these issues, start with a seated spinal twist. Sit tall with both feet flat on the floor. Place your left hand on your right knee and gently rotate your torso to the right, looking over your shoulder. Hold for three breaths, then switch sides. This improves range of motion in the spine and helps with posture correction.
Next, try a towel stretch for the hamstrings. Sit on the edge of the chair with one leg extended forward and heel on the floor. Loop a towel around the ball of your foot and gently pull until you feel a mild stretch behind the thigh. This safe method relieves muscle stiffness and supports knee pain management without compromising balance.
Finally, practice standing hip flexor stretches while holding the chair back for support. This improves gait stability and makes daily living tasks like climbing stairs easier. Proper chair use turns a simple prop into a powerful tool for gentle exercise and sciatica relief, enhancing both safety and functional fitness.
4. Incorporating Breathing Techniques with Each Stretch
Did you know that the way you breathe during a stretch can double its effectiveness for both your muscles and your mind? Many seniors overlook this simple tool, yet it transforms a basic stretching routine into a powerful session for pain relief and relaxation. Your breath is always with you, making it the most accessible equipment in your home workout arsenal. Why breathe deeply during stretching? Shallow breathing keeps your body in a mild state of tension, which works against your flexibility goals. Deep breathing signals your nervous system to relax, allowing muscles to release their grip. This is especially helpful for managing arthritis pain and reducing muscle stiffness in the hips, back, and shoulders. Can I improve my breathing to reduce pain? Yes, absolutely. Practicing diaphragmatic breathing trains your body to use its full lung capacity, which improves blood circulation and oxygen delivery to tight tissues. Over time, this technique can lower your perception of discomfort during daily living tasks like bending to tie shoes or reaching overhead.
The Diaphragmatic Breathing Method
To begin, place one hand on your belly and one on your chest. Inhale slowly through your nose, feeling your belly rise like a balloon while your chest stays relatively still. Exhale gently through your mouth, letting your belly fall naturally. This pattern engages your core and promotes a calm, focused state. A simple rhythm that works well for seniors is inhaling for 4 counts and exhaling for 6 counts. The longer exhale activates your relaxation response, which helps reduce overexertion risk during stretching. Practice this for a few minutes while seated before you even start moving.
Coordinating Breath with Movement
The key is to pair your breath with each phase of the stretch. Use your inhale to prepare the body and your exhale to deepen the movement. This creates a smooth, mindful flow that improves joint mobility and range of motion without forcing anything. For example, during a hamstring stretch, inhale as you sit tall and lengthen your spine. Then exhale as you gently hinge forward, allowing the stretch to deepen naturally. This breath-movement connection also supports balance improvement and posture correction as you move through each pose.
A 5-Minute Mindful Stretching Session
Try this simple script to combine breathing with gentle movement. Find a chair with good support and wear comfortable clothing. Keep a water bottle nearby for hydration during exercise. Start seated with your feet flat on the floor. Inhale for 4 counts, lifting your arms overhead. Exhale for 6 counts, lowering your arms and relaxing your shoulders. Repeat this shoulder roll motion 3 times to release upper body tension. Next, perform a neck tilt. Inhale as you sit tall, exhale as you slowly drop your right ear toward your right shoulder. Hold for one full breath cycle, then switch sides. This helps with neck stiffness and improves your visual focus for better coordination. Finish with a seated spinal twist. Inhale to lengthen your spine, exhale to rotate gently to the right, placing your left hand on your right knee. Hold for two breath cycles, then repeat on the left side. This movement supports fascia release and keeps your back flexible for chair yoga and other activities. Remember to keep all movements pain-free and within your comfort zone. If you feel sharp discomfort, ease off and reduce the intensity level. This mindful approach to stretching frequency and duration will help you build a sustainable practice that supports active aging and independence for years to come.
5. Following Online Video Classes Designed for Seniors

Picture this: your living room transformed into a personal studio where an instructor guides you through gentle movements, all without leaving home. That is exactly what happened for Margaret, a 72-year-old retiree who spent months watching online fitness videos with skepticism. She worried about complicated technology and feared looking foolish during a live session.
Her turning point came when her local senior center announced a weekly virtual yoga class. A friendly staff member walked her through the Zoom setup over the phone, easing her initial tech hesitancy. After one session, Margaret realized the instructor demonstrated every pose slowly and offered chair variations for balance support. She now logs in every Tuesday morning with the same group of familiar faces, finding motivation in their shared commitment.
When choosing an online class, look for certified instructors who specialize in senior fitness. The best programs emphasize low-impact movements, clear verbal cues, and modifications for arthritis, knee pain, or back pain. Avoid classes that move too quickly or require complex transitions between poses.
For a safe home setup, place your exercise mat on a non-slip surface near a sturdy chair or wall for standing support. Keep a water bottle within reach and ensure your device is at eye level so you can see the instructor without craning your neck. Many seniors find that using a tablet or laptop on a countertop works better than a phone screen.
The social element matters as much as the physical movement. Group classes offered through senior centers or community programs create accountability and reduce feelings of isolation. Participants often arrive early to chat, sharing tips about managing muscle stiffness or celebrating small wins in their stretching routine. This blend of gentle exercise and social engagement supports both joint mobility and emotional well-being.
6. Stretching to Relieve Joint Stiffness from Arthritis
For those living with arthritis, a gentle stretching routine isn’t just about flexibility-it’s a daily tool for managing pain and preserving independence. Many seniors hesitate to move stiff joints, fearing that stretching will worsen their condition. The truth is quite the opposite. Gentle, controlled movement can actually reduce stiffness and improve joint mobility over time.
Let’s clear up some common myths. First, stretching does not make arthritis worse when done correctly. Second, you do not need to wait until you are completely pain-free to stretch. Pain-free movement within your current range of motion is both safe and beneficial. The key is to avoid pushing into sharp or severe pain, which signals tissue strain rather than therapeutic release.
Stretching stimulates the production of synovial fluid, the body’s natural joint lubricant. This fluid nourishes cartilage and reduces friction during movement. Think of it as oiling a rusty hinge: slow, deliberate motion helps the joint move more smoothly with less discomfort. Regular gentle exercise also supports blood circulation, which brings nutrients to the joint area and helps ease muscle stiffness.
For arthritis management, consistency matters more than intensity. A short daily routine is far more effective than a long session done once a week. Start with just five minutes and gradually build up as your joints respond positively. Always warm up with light movement, such as walking around the room, before attempting deeper stretches.
Common Arthritis Stretching Myths
- Myth: Stretching damages arthritic joints. Fact: Slow, gentle stretching within your comfort zone actually supports joint health and reduces stiffness.
- Myth: You should only stretch when pain-free. Fact: Mild discomfort from stiffness is normal. You only need to avoid sharp, shooting, or severe pain.
- Myth: If it hurts, it’s working. Fact: For arthritis, pain is a signal to back off. Stretching should feel like a mild pull, never a painful strain.
- Myth: Stretching is useless once joints are damaged. Fact: Even with joint changes, stretching preserves the range of motion you still have and helps prevent further decline.
Practical Stretches for Hands, Knees, and Hips
For hand arthritis, try gentle finger bends. Open your palm flat, then slowly curl your fingers into a loose fist. Hold for five seconds, then straighten. Repeat with each hand. This simple movement helps maintain grip strength for daily living tasks like holding utensils or opening jars.
For knee stiffness, sit in a sturdy chair with feet flat on the floor. Slowly extend one leg straight out, hold for a few seconds, then lower it. This seated leg extension strengthens the quadriceps and improves knee joint mobility without putting weight on the joint. Perform eight to ten repetitions per leg.
For hip flexibility, try the seated hip march. While sitting tall, lift one knee toward your chest as far as comfortable, then lower it. Alternate legs. This movement addresses hip flexors, which often tighten with prolonged sitting. Improved hip mobility supports gait stability and makes stair climbing easier.
Sample Arthritis-Friendly Morning Routine
Begin with neck tilts: gently lower your right ear toward your right shoulder, hold for 15 seconds, then switch sides. Follow with shoulder rolls, circling your shoulders backward five times and forward five times. These warm-up exercises prepare the upper body for movement.
Move to the chair yoga sequence for the lower body. Perform ten seated leg extensions, then ten hip marches. Finish with a towel stretch for the hamstrings: loop a towel around your foot, gently pull your leg straight, and hold for 20 seconds. This cool-down stretch helps maintain hamstring flexibility without straining the lower back.
Remember to breathe deeply throughout each movement. Slow, rhythmic breathing promotes relaxation and reduces the tendency to tense up. If a particular stretch causes sharp pain, stop and modify it. Consider using a wall for balance support or an exercise mat for comfort. Over time, this gentle approach can significantly improve joint mobility and make daily living tasks feel less challenging.
7. Using Smartphone Apps for Guided Reminders and Progress
Imagine having a personal stretching coach in your pocket that nudges you to move every few hours, that’s the power of modern smartphone apps. These tools turn a standard stretching routine into an interactive experience with timers, visual guides, and gentle alerts. For seniors, the best apps focus on senior flexibility and joint mobility with simple, large-button interfaces.
Setting up an app usually takes less than five minutes. You pick your comfort level, choose from seated or standing options, and set your preferred times for reminders. The notification acts as a cue to break up sedentary behavior, which is essential for fall prevention and gait stability. A quick two-minute session can reduce muscle stiffness and improve blood circulation without leaving your chair.
Here are five highly rated apps that work well for older adults:
- Stretch It: Offers full-body routines with animated guides. It includes a daily plan builder and gentle audio cues, making it easy to follow along without squinting at the screen.
- Senior Fitness: Designed specifically for active aging, this app features chair yoga and balance exercises. It uses large text and high-contrast colors for easy readability.
- Yoga for Seniors: Focuses on modified poses and seated variations. Each session includes breathing techniques and mindfulness movement to support relaxation and posture correction.
- Relax & Stretch: Provides targeted routines for back pain, knee pain, and hip flexors. It works offline, so you can use it in a park or at a community center without Wi-Fi.
- Pocket Yoga: Uses illustrated pose cards instead of video, which helps seniors move at their own pace. It tracks progress over time and allows for gradual progression.
When choosing an app, prioritize large text, a simple interface, and offline capabilities. Many seniors prefer apps that do not require an account or a subscription. Start with the free version of an app to test the layout. Look for settings that let you adjust the reminder frequency, so you are not overwhelmed by constant alerts.
Use the progress tracker to log your range of motion and stretching frequency each week. This visual record helps you notice small improvements in balance improvement and muscle strength. Set a daily reminder for the same time each morning to build a consistent habit. Over time, these gentle prompts support exercise adherence and make daily living tasks like bending to tie shoes or reaching overhead feel easier.
8. Partner Stretching with a Spouse or Caregiver
Stretching doesn’t have to be a solo activity-partnering up can turn a routine into a bonding experience while making each stretch safer and more effective. Consider the case of Margaret and Roy, a couple in their late 70s who introduced partner stretching into their evening routine after Roy’s knee replacement surgery. What began as a way to support Roy’s physical therapy quickly became their favorite part of the day.
At first, the couple struggled to communicate their comfort levels. Margaret would pull too hard on Roy’s leg, and Roy would wince instead of speaking up. They learned to use simple verbal cues like “more” and “ease off,” which transformed their sessions into a practice of trust and attentiveness. Now, they spend 15 minutes each night on their exercise mat, alternating between seated variations and standing support stretches.
The key to their success was starting slow and using a towel as a buffer for grip. They discovered that assisted stretching allowed Roy to achieve a deeper range of motion than he could alone, while Margaret benefited from the gentle core engagement required to stabilize him. Their story shows that partner work is not about strength, but about safety cues and mutual awareness.
Beyond the physical gains, this shared activity has improved their mood enhancement and social engagement. They laugh more, argue less, and look forward to this quiet time together. For caregivers, this approach turns a duty into a meaningful connection, reducing feelings of isolation for both parties.
Here are three safe partner-assisted stretches that Margaret and Roy use, all designed for pain relief and joint mobility without straining fragile muscles.
- Seated Hamstring Pull: Both partners sit on the floor, facing each other with legs extended. Place a towel looped around the stretching partner’s foot. The partner holding the towel gently pulls while the stretcher keeps their back straight. Hold for 20 seconds. This targets hamstring stretch and muscle stiffness in the lower back.
- Back-to-Back Side Stretch: Sit back-to-back with knees bent and feet flat. One partner raises their left arm overhead while the other leans right, creating a gentle spinal twist effect. Alternate sides. This improves posture correction and opens the hip flexors.
- Standing Shoulder Support: One partner stands behind the other, placing hands on their shoulders. The front partner slowly rolls their shoulders forward and back while the back partner provides gentle resistance. This is excellent for shoulder roll mobility and neck tilt relief after long periods of sitting.
Safety is paramount in any partner work. Never pull a limb into pain, and always communicate clearly before increasing pressure. Use a chair for balance improvement if either partner feels unsteady. Stop immediately if you feel a sharp sensation, as overexertion risk increases when two people are involved.
The psychological benefits of this shared practice are just as important as the physical ones. Research suggests that synchronized movement with a partner can enhance mindfulness movement and deepen emotional bonds. For seniors, this type of gentle exercise supports active aging by making exercise adherence feel like a team effort rather than a chore.
Margaret notes that their evening stretching has improved Roy’s gait stability and her own balance exercises proficiency. More importantly, it has given them a shared language of care. Whether you stretch with a spouse, a sibling, or a paid caregiver, the routine becomes a group motivation tool that reinforces functional fitness for daily living tasks like getting up from a chair or …

From ancient grain to modern superfood, hemp has quietly revolutionized the culinary world with its nutty flavor and exceptional nutritional profile. As plant-based eating gains momentum, this versatile ingredient offers a complete protein source rich in omega-3s. Discover how to master hemp seeds, oil, and flour-from toasting techniques for maximum crunch to heat-safe cooking methods and smart storage solutions that preserve freshness.
1. Why Cook with Hemp: Nutrition and Flavor Basics

Ever wondered what makes hemp seeds a superfood? These tiny powerhouses pack an impressive nutritional punch that goes far beyond their size. Hemp seeds are one of the most complete plant-based proteins available, containing all nine essential amino acids your body needs but cannot produce on its own.
The star players here are the proteins edestin and albumin, which are highly digestible and easy on the stomach. Hemp also delivers a perfect balance of omega-3 and omega-6 fatty acids, plus a special compound called GLA that supports skin health and overall wellness. Research suggests this fatty acid profile is rare among plant foods, making hemp a standout choice for anyone looking to boost their nutrition naturally.
Beyond the impressive nutrient list, hemp brings a delightful flavor to the kitchen. The seeds offer a mild, nutty taste with subtle earthy undertones that complements both sweet and savory dishes. Hemp hearts, which are shelled hemp seeds, have a soft texture that blends seamlessly into smoothies, while hemp oil adds a rich, grassy note to dressings and dips.
Best of all, hemp is naturally vegan and gluten-free, making it an inclusive ingredient for almost any dietary lifestyle. Whether you are baking, sauting, or blending, hemp adapts beautifully without overpowering other flavors. In the sections ahead, you will discover practical ways to use hemp oil, seeds, flour, and protein powder in everyday cooking, plus tips for storage and heat management. Get ready to make hemp a pantry staple that elevates both nutrition and taste in every meal.
2. Hemp Seeds vs. Hemp Oil: Choosing the Right Ingredient
When you’re staring at the pantry shelf, knowing whether to grab seeds or oil can make or break your dish. Both come from the same plant, but they behave very differently in the kitchen. Hemp seeds, also known as hemp hearts, offer texture and structure, while hemp oil delivers flavor and richness.
Shelled hemp seeds are soft and tender with a mild, nutty taste. They work beautifully in baked goods, salads, and granola where you want a subtle crunch or creamy chew. Hemp oil, especially cold-pressed and unrefined, is a finishing ingredient. It shines when drizzled over finished dishes or whisked into dressings.
The key difference comes down to heat. Hemp oil has a low smoke point and is highly heat-sensitive. Exposing it to high temperatures can destroy its delicate nutrients and create a bitter flavor. Seeds, on the other hand, can withstand light toasting or baking without losing their appeal.
| Characteristic | Hemp Seeds (Hemp Hearts) | Hemp Oil (Cold-Pressed) |
|---|---|---|
| Flavor | Mild, nutty, slightly earthy | Rich, nutty, grassy undertones |
| Texture | Soft, chewy, adds crunch when toasted | Smooth, liquid, silky |
| Nutrition | Protein, fiber, omega-3 and omega-6, magnesium, zinc | Omega-3 and omega-6, GLA, vitamin E, antioxidants |
| Best Uses | Baking, smoothies, salads, granola, pesto, energy balls | Dressings, marinades, drizzles, dips, low-heat sauces |
| Heat Stability | Can handle baking and light toasting | Low smoke point, avoid high heat |
| Shelf Life | Longer if stored in a cool, dry place | Shorter, needs refrigeration after opening |
If you want crunch and texture, reach for hemp seeds. Sprinkle them over yogurt, oatmeal, or pasta for an instant upgrade. They also act as a great thickener or egg replacement in vegan baking. You can blend them into smoothies or grind them into a paste for hummus and spreads.
If you want a nutty dressing or a finishing drizzle, choose hemp oil. It emulsifies beautifully with vinegar and citrus for salads. Use it in marinades, over roasted vegetables after cooking, or stirred into risotto off the heat. Its green color and earthy taste add depth to cold dishes.
There is no winner here, only the right tool for the job. Consider your recipe’s needs first. For no-bake treats like energy balls, seeds provide structure. For a delicate sauce or dip, oil brings silkiness. Both offer plant-based protein, essential amino acids, and a gluten-free, vegan-friendly boost to your cooking.
Storage matters too. Keep hemp seeds in an airtight container away from light. Refrigerate hemp oil once opened to prevent rancidity. With proper care, both ingredients stay fresh and ready for your next culinary creation.
3. Toasting Hemp Seeds for a Nutty Crunch
A dry skillet and five minutes are all it takes to transform hemp seeds into a crunchy topping. Raw shelled hemp seeds, also known as hemp hearts, have a soft texture and a mild, earthy taste. A quick toast changes their character entirely, bringing out a deep, nutty flavor and a satisfying crispness that raw seeds simply lack.
To toast on the stovetop, place a single layer of hemp hearts in a dry skillet over medium heat. Stir them constantly with a wooden spoon or spatula for 3 to 5 minutes. You will know they are ready when they turn a light golden brown and release a warm, fragrant aroma that smells similar to toasted sesame or sunflower seeds.
For the oven method, preheat your oven to 350 degreesF. Spread the hemp seeds evenly on a parchment-lined baking sheet. Bake for 5 to 7 minutes, shaking the pan halfway through to ensure even toasting. Watch them closely during the final minute, as oven temperatures can vary and the seeds can go from golden to burnt very quickly.
Over-toasting is the biggest risk with hemp seeds. Because they are rich in omega-3 and omega-6 fatty acids, they burn faster than many other nuts and seeds. Burnt hemp seeds turn dark brown, taste bitter, and lose their nutritional value. If you notice a sharp, acrid smell, remove them from the heat immediately, they are already past the point of no return.
Once toasted, let the seeds cool completely before using or storing them. The cooling process adds extra crunch as the oils settle. Sprinkle them over salads, oatmeal, yogurt, or even pasta and risotto for a delightful textural contrast. They also make an excellent topping for hummus, dips, and roasted vegetables.
Always store toasted hemp seeds separately from your raw batch. Toasting changes their moisture content and makes them more prone to rancidity. Keep the toasted seeds in an airtight glass jar in the refrigerator and use them within one week. The raw seeds can stay in their original packaging, but they also benefit from cold storage to extend their shelf life and preserve their delicate fatty acids.
4. Blending Hemp into Smoothies and Breakfast Bowls
Mornings get a protein-packed upgrade when you toss a spoonful of hemp hearts into your blender. The classic breakfast problem is real: you eat a bowl of cereal or toast, and within an hour, your stomach is growling again. Hemp seeds solve this by adding plant-based protein and healthy fats that keep you satisfied well past lunchtime.
You do not need to change your favorite smoothie recipe to enjoy the benefits. Just add 2 tablespoons of shelled hemp seeds to your usual mix of fruit, greens, and liquid. The seeds blend into a silky, creamy texture that makes your drink feel richer, yet they do not overpower the flavor. Their mild, nutty taste disappears behind berries, bananas, or mango, making them a perfect stealth ingredient.
For a green smoothie, combine a handful of spinach, one frozen banana, a cup of unsweetened hemp milk, and your 2 tablespoons of hemp hearts. The result is a thick, frothy drink with a pleasant earthy undertone. Hemp seeds act as a natural emulsifier, so your smoothie stays smooth and does not separate into watery layers as it sits.
Breakfast bowls work just as well as drinks. Stir 2 tablespoons of hemp hearts into a bowl of hot oatmeal, or sprinkle them over Greek yogurt for added crunch. You can also blend them into a smoothie bowl base, then top with fresh fruit, granola, and an extra pinch of seeds. Since hemp seeds are naturally gluten-free and vegan, they fit nearly every dietary preference without any extra prep work.
5. Making Hemp Pesto and Sauces
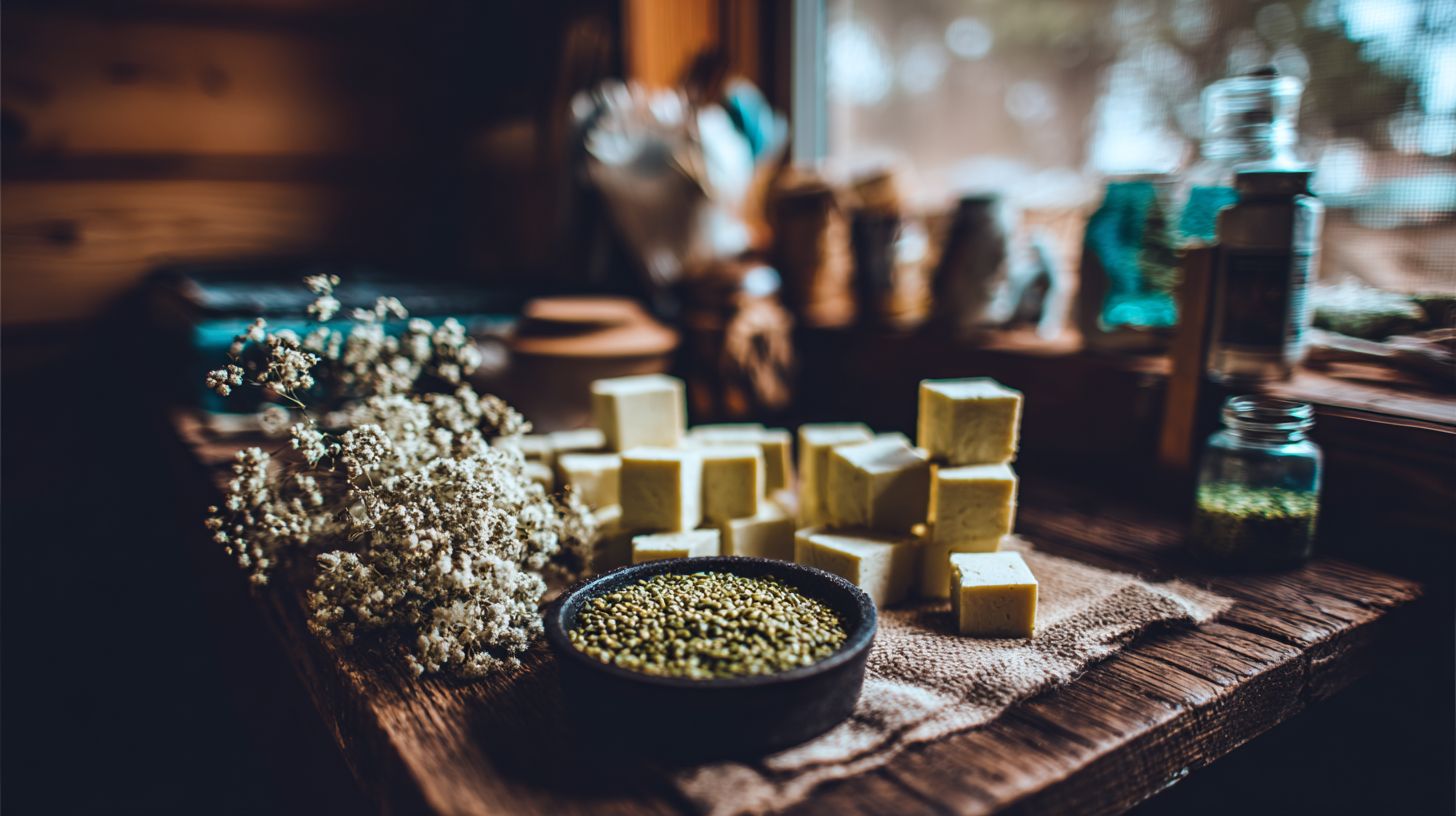
Classic pesto gets a dairy-free makeover with hemp seeds standing in for pine nuts. The result is a creamy, vibrant sauce that comes together in about five minutes. Shelled hemp seeds, also called hemp hearts, blend effortlessly into a smooth base without any soaking or pre-processing.
Start with a basic recipe: combine 1 cup fresh basil, 1/2 cup hemp hearts, 1 garlic clove, and the juice of half a lemon in a food processor. Pulse while streaming in 1/3 cup of olive oil or cold-pressed hemp oil. Add salt to taste and a spoonful of nutritional yeast for a cheesy, savory note if you like.
The magic happens because hemp seeds contain natural oils and proteins that emulsify when blended. This creates a luscious, creamy texture without any dairy. The flavor is mild and nutty, not overpowering, which lets the basil and garlic shine through.
Mix the pesto into warm pasta, spread it on crusty bread, or dollop it over roasted vegetables. It also works beautifully as a sandwich spread or a quick marinade for grilled chicken or tofu.
For a sun-dried tomato variation, swap half the basil for 1/2 cup of oil-packed sun-dried tomatoes. Add a pinch of red pepper flakes for a gentle kick. This version pairs exceptionally well with white beans or as a topping for crostini.
Try a kale pesto by replacing the basil with 2 cups of stemmed, chopped kale. Massage the kale with a little lemon juice first to soften it. The earthy taste of kale combines nicely with the nutty flavor of the hemp seeds, and the green color stays vibrant.
You can also experiment with other greens like spinach or arugula. Each green brings its own personality, from peppery arugula to mild spinach, while the hemp seeds keep everything creamy and cohesive.
When using hemp oil in your pesto, remember it has a low smoke point. This sauce is strictly a no-cook preparation, so the oil never gets heated. That preserves the delicate omega-3 and omega-6 fatty acids that make hemp oil so nutritious.
If you use hemp oil, consider blending it with olive oil. A 50-50 mix gives you the grassy, earthy taste of hemp without it dominating the entire sauce. Store any leftover pesto in a jar with a thin layer of oil on top to keep it fresh.
Beyond pesto, hemp seeds shine in creamy sauces and dips. For a quick hemp ranch, whisk together 1/2 cup hemp hearts, 1/4 cup water, 2 tablespoons apple cider vinegar, and a teaspoon of dried dill. Add garlic powder, onion powder, and salt, then adjust the consistency with more water.
This ranch dip thickens as it sits, so let it rest in the fridge for 15 minutes before serving. It works as a vegetable dip, a salad dressing, or a drizzle for grain bowls. The hemp seeds act as a natural thickener, so you skip the mayonnaise entirely.
For a creamy hemp Alfredo, blend 1 cup hemp hearts with 3/4 cup water, 2 tablespoons nutritional yeast, a garlic clove, and a pinch of nutmeg. Warm it gently in a saucepan over low heat, stirring constantly. Do not boil it, as that can make the sauce separate.
Toss the warm sauce with fettuccine and steamed broccoli for a satisfying weeknight meal. The sauce clings to the pasta beautifully, and the hemp seeds provide a protein boost that traditional Alfredo lacks.
These sauces keep well in the refrigerator for up to five days. The fats in hemp seeds can turn rancid over time, so always store them in an airtight container. Refrigeration slows oxidation and preserves the fresh, nutty flavor.
You can also freeze pesto in ice cube trays for single servings. Pop out a cube whenever you need a quick sauce for pasta or a flavor boost for soups. This makes meal prep simple without sacrificing quality.
6. Baking with Hemp Flour: Substitution Tips
Hemp flour brings a nutty, earthy note to baked goods, but swapping it 1:1 for wheat flour can lead to dense results. The reason comes down to structure. Hemp flour is gluten-free and high in protein, yet it lacks gluten’s elasticity, which gives bread and muffins their rise.
Because of this, you need to treat hemp flour as a partial replacement rather than a full swap. A good starting point is to replace 25 to 30 percent of the all-purpose flour in a recipe with hemp flour. This keeps the texture recognizable while adding a pleasant green tint and a boost of plant-based protein.
You also need to compensate for the missing gluten. Adding a binder helps hold the crumb together. For every cup of hemp flour you use, consider adding one teaspoon of xanthan gum or an extra egg. Vegans can use a flax egg, which is one tablespoon of ground flaxseed mixed with three tablespoons of water.
Hemp flour absorbs more moisture than wheat flour, so your batter may look dry at first. Do not panic. Add an extra tablespoon or two of liquid, such as hemp milk or plain water, until the batter reaches the usual consistency. Letting the batter rest for 10 minutes also gives the flour time to hydrate fully.
- Muffins: Use 1/4 cup hemp flour per 1 cup all-purpose flour. Add one extra egg and 2 tablespoons of hemp milk. Expect a denser, hearty crumb.
- Bread: Keep hemp flour at 20 percent of the total flour weight. Combine it with a strong wheat flour or add vital wheat gluten to maintain structure.
- Pancakes: Swap 1/3 cup of the flour for hemp flour. Thin the batter with extra hemp milk, since pancakes need a pourable consistency.
For best results, sift hemp flour before measuring, as it tends to clump. Store it in the refrigerator or freezer to prevent rancidity, since the natural oils in hemp flour can go off at room temperature. With these adjustments, you can enjoy the nutty flavor and nutritional benefits without sacrificing texture.
7. Adding Hemp to Salads and Dressings
A salad becomes a complete meal when you sprinkle hemp hearts and whisk up a hemp oil vinaigrette. The beauty of hemp is that it requires zero cooking time to shine. You can transform a simple bowl of greens into a satisfying dish packed with plant-based protein and omega-3 fatty acids in under five minutes.
Hemp hearts are the quickest win in your salad rotation. These shelled hemp seeds have a soft, tender texture that blends well with crisp vegetables. They do not need soaking or grinding, so you can toss them straight from the bag onto your plate.
For the dressing, cold-pressed hemp oil brings a rich, earthy taste that elevates any vinaigrette. Since hemp oil is heat-sensitive, it works best in raw applications like dressings and marinades. Keep it in the refrigerator to maintain freshness and prevent rancidity.
Basic Hemp Oil Vinaigrette
This simple dressing comes together in one jar and pairs well with almost any salad combination. The Dijon mustard acts as an emulsifier, helping the oil and lemon juice stay blended.
- Combine 3 tablespoons of hemp oil with 1 tablespoon of fresh lemon juice in a small jar.
- Add 1 teaspoon of Dijon mustard, a pinch of salt, and a few cracks of black pepper.
- Stir in 1 teaspoon of chopped fresh herbs, such as parsley, chives, or dill.
- Secure the lid and shake vigorously for 20 seconds until the mixture looks creamy.
- Taste and adjust the lemon or salt to your preference before serving.
This dressing stays fresh for up to three days in the fridge. Give it a quick shake before each use, as the oil will naturally separate when chilled.
Crunchy Topping Ideas
Raw hemp hearts offer a soft chew, but toasting them unlocks a deeper, nuttier flavor with extra crunch. Spread shelled hemp seeds in a dry skillet over medium heat for two to three minutes, stirring constantly until they turn lightly golden.
Use toasted hemp seeds as a finishing touch on any salad. They pair especially well with roasted vegetables, grain bowls, and fresh summer greens. A generous sprinkle adds texture and a boost of minerals like magnesium and zinc.
For an even quicker option, keep raw hemp hearts in a shaker jar on your counter. One or two tablespoons per serving is enough to add protein and healthy fats without overpowering the dish.
Flavor Pairing Guide
Hemp’s nutty flavor profile works beautifully with bright and tangy ingredients. The natural earthiness of hemp seeds and oil balances well against acidic components like lemon juice, vinegar, and citrus segments.
- Citrus fruits like orange, grapefruit, and lemon brighten the nutty taste of hemp oil.
- Berries such as strawberries, blueberries, and raspberries add sweetness that complements the seeds.
- Bitter greens like arugula, radicchio, and endive stand up well to hemp’s robust flavor.
- Creamy elements like avocado, goat cheese, or feta help mellow the earthy notes.
Experiment with adding a spoonful of hemp butter to your dressing for extra creaminess. This works especially well in thicker, ranch-style dressings or creamy herb sauces.
Remember to add hemp oil at the end of your dressing preparation. If you blend it with acidic ingredients too early, the flavor can become slightly bitter. Whisk it in last, just before serving, to preserve its delicate, grassy character.
Salads with hemp are perfect for meal prep since the seeds hold their texture well. Store dressing separately and toss everything together right before eating to keep the greens crisp and the hemp hearts crunchy.
8. Cooking with Hemp Oil: Heat Rules and Finishing Dishes
Think of hemp oil as a finishing touch rather than a cooking fat-its delicate nature demands respect. Unlike olive or coconut oil, unrefined, cold-pressed hemp oil has a very low smoke point. Exposing it to high heat will destroy the beneficial fatty acids and produce a bitter, burnt flavor.
Never use hemp oil for sauting, frying, or roasting. The heat breaks down its structure, turning its delicate, nutty flavor into something harsh and unpleasant. Instead, reserve it for dishes that are already cooked or served cold. This preserves both the taste and the nutritional profile, including the omega-3 and omega-6 fatty acids.
To get the most from your hemp oil, follow these simple heat rules. Use it raw in dressings and marinades, or add it to hot dishes just before serving. A final drizzle over soup, pasta, or roasted vegetables adds a rich, earthy taste without compromising the oil’s integrity. You can also whisk it into pesto, hummus, or yogurt-based sauces for a creamy finish.
For emulsified dressings, hemp oil shines. Combine it with lemon juice, vinegar, and a touch of Dijon mustard to create a stable vinaigrette. The oil’s green color and grassy notes pair beautifully with fresh herbs and citrus. In marinades, it works well with garlic and soy sauce, but only for quick applications or as a post-cook glaze.
Compare this to olive oil, which can handle moderate heat for light sauting, or coconut oil, which is stable for frying. Hemp oil simply cannot compete in those applications. If you want a high-heat option with a similar nutritional boost, use a refined hemp seed oil, but know that it loses most of the beneficial compounds during processing. For maximum benefits, keep your cold-pressed bottle in the refrigerator and use it within a few months of opening to prevent rancidity.
9. Hemp-Based Snacks and Energy Bites

When the 3 p.m. slump hits, a hemp energy bite offers a satisfying crunch without the sugar crash. These no-bake snacks come together in minutes using simple pantry staples. Hemp hearts bring a nutty flavor and a serious protein boost to every batch.
The classic energy ball formula is easy to memorize. Combine one cup of pitted dates, one cup of rolled oats, and a half cup of your favorite nut butter in a food processor. Add a quarter cup of shelled hemp seeds and pulse until the mixture holds together when pressed.
Roll the mixture into small balls and refrigerate for about 30 minutes. No oven required, no complicated steps, just a quick stir and roll. Each bite delivers plant-based protein, healthy fats, and fiber to keep you full between meals.
Customize your base recipe with mix-ins that suit your taste. Try dark chocolate chips, dried cherries, shredded coconut, or a sprinkle of cinnamon. For a spicy kick, add a pinch of ginger or cardamom to the food processor before blending.
Homemade granola with hemp seeds is another quick win. Toss rolled oats with a few tablespoons of hemp oil, maple syrup, and your favorite nuts. Spread on a baking sheet and toast at 300 degreesF for 20 minutes, stirring halfway through.
Simple hemp crackers require just three ingredients. Mix hemp flour with water and a pinch of salt, then roll the dough thin and score it into squares. Bake at 350 degreesF for 12 to 15 minutes until crisp, then serve with hummus or a hemp-based dip.
Keep a jar of these snacks on your desk or in your bag for busy days. They store well in an airtight container for up to a week, making them perfect for meal prep. The combination of omega-3 and omega-6 fatty acids supports steady energy without the crash.
10. Storing Hemp Products for Freshness
Ever opened a bag of hemp seeds to find a stale smell? Proper storage prevents that. Hemp seeds, hemp oil, and hemp flour are prone to rancidity because they are rich in unsaturated fats, including omega-3 and omega-6 fatty acids. Exposure to heat, light, and oxygen triggers oxidation, which ruins both flavor and nutritional value.
Myth: Hemp products last forever at room temperature. The reality is quite different. Shelled hemp seeds, also called hemp hearts, can go rancid in just a few weeks if left in a warm pantry. Reality: Refrigeration extends shelf life significantly. Cold temperatures slow down the oxidation process, keeping your ingredients fresh for months instead of weeks.
For best results, transfer hemp hearts and shelled hemp seeds into an airtight glass jar or container. Store them in the refrigerator or freezer. Hemp oil, especially cold-pressed and unrefined varieties, should always live in a cool, dark place, preferably the fridge. Hemp flour also benefits from refrigeration to protect its delicate fats and maintain its green color.
Watch for signs of spoilage before cooking. A bitter or paint-like smell and an off, sharp taste are clear red flags. Fresh hemp seeds have a mild, nutty flavor and a soft crunch. If the texture turns greasy or the aroma becomes unpleasant, discard the product immediately. Proper storage keeps your hemp ingredients ready for smoothies, salads, and baking.
Plan your purchases around your actual usage. Hemp seeds last about 1 to 2 months at room temperature, but they stay fresh for up to a year in the freezer. Hemp oil keeps for roughly 3 to 6 months when refrigerated. Label your containers with purchase dates and always use clean, dry spoons to avoid introducing moisture or bacteria into the jar.
Frequently Asked Questions
Does Cooking With Hemp mean I can get high from my food?
No, absolutely not. Cooking With Hemp using standard hemp seeds, hemp hearts, or hemp protein powder will not produce any psychoactive effects. These parts of the plant contain only trace amounts of THC (typically below 0.3%), far too little to cause a “high.” However, if you are cooking with hemp flower or hemp extracts that are specifically labeled as containing delta-8 or delta-9 THC, that’s a different story-those are psychoactive. For everyday culinary use, stick …

When TikTok first gained global attention, it was known for short dance clips and catchy lip-sync videos from China’s parent company, ByteDance. Fast forward a few years, and the platform has transformed into a cultural powerhouse—and the United States now sits at the center of its influence.
From viral challenges and chart-topping music trends to billion-dollar creator deals, American influencers have redefined TikTok and turned it into one of the most impactful social media stages in the world.
From Musical.ly Roots to Mainstream America
TikTok’s journey began in 2018 when it merged with Musical.ly, a popular lip-sync app that already had a large U.S. user base. This strategic move gave TikTok an instant American foothold.
With easy-to-use editing tools and an addictive For You Page, TikTok quickly captured younger audiences who were ready for a platform beyond Instagram and Facebook. Within a year, millions of U.S. teenagers and twenty-somethings were creating bite-sized videos at an unprecedented rate.
Key Insight
By combining Musical.ly’s early adopters with TikTok’s next-level algorithm, the app became a perfect storm for viral growth in the United States.
Why American Creators Took the Lead
Several factors helped U.S.-based influencers dominate TikTok’s global scene:
A Culture of Entertainment
America has long been a global exporter of entertainment—from Hollywood to hip-hop. This cultural foundation made U.S. creators natural storytellers, blending humor, music, and personality into snackable videos that resonate worldwide.
English as a Global Language
English remains the dominant language for international social media, giving American influencers an immediate global audience and brand reach.
Early Adoption by Celebrities
From musicians like Lil Nas X to actors and professional athletes, American celebrities jumped on TikTok early. Their participation amplified the platform’s credibility and drew massive mainstream audiences.
Strong Brand and Sponsorship Ecosystem
U.S. companies—from fashion labels to tech brands—were quick to sponsor creators. These partnerships provided financial incentives that allowed influencers to focus full-time on content creation.
Defining the TikTok Aesthetic
While TikTok is used worldwide, American creators helped shape the trends that define its look and feel.
-
Dance Challenges: Viral dances like the Renegade and Savage became global phenomena.
-
Comedy and Sketches: Short-form comedy with quick cuts and punchlines flourished.
-
Educational “Edutok” Content: From science explainers to finance tips, American educators tapped into TikTok’s short attention span with creative micro-lessons.
-
Lifestyle and Vlogging: Day-in-the-life videos, recipe demos, and home makeovers gave audiences a candid view of U.S. culture.
These formats continue to set the standard for creators worldwide.
TikTok’s Role in U.S. Music and Business

TikTok is no longer just a social app—it’s a music industry kingmaker. Many American hits, from Doja Cat’s “Say So” to Olivia Rodrigo’s “drivers license,” exploded because of TikTok trends.
Brands have also retooled marketing to fit the TikTok style: fast, authentic, and interactive. From small businesses to household names, companies invest heavily in influencer partnerships and creative campaigns to tap the platform’s unmatched organic reach.
Quick Call-out
“Today, a 15-second TikTok clip can launch a career faster than a traditional record label deal.”
Shaping Global Conversations
American TikTokers don’t just entertain—they influence culture and politics. Creators use the platform to:
-
Mobilize for social justice causes
-
Share breaking news and citizen journalism
-
Educate followers on mental health, personal finance, and climate action
The U.S. creator community has turned TikTok into a space where serious conversations unfold in real time, making it a central player in how people worldwide consume information.
Economic Impact of the TikTok Creator Economy
The U.S. creator economy around TikTok is massive. Influencers earn income through:
-
Creator Fund & Ad Revenue
-
Brand Sponsorships & Product Placements
-
Merchandise, Courses, and Fan Subscriptions
In turn, businesses benefit from micro-influencer marketing, often seeing higher engagement and ROI compared to traditional ads. Cities like Los Angeles have become creative hubs where entire agencies specialize in TikTok content production.
Challenges and the Road Ahead
Despite its success, TikTok in the United States faces challenges:
-
Regulatory Scrutiny: Concerns over data privacy and national security have led to potential restrictions and legislation.
-
Algorithm Transparency: Questions about how content is promoted or suppressed remain.
-
Creator Burnout: Constant demand for fresh content can lead to stress and creative fatigue.
Still, American creators continue to adapt—experimenting with longer videos, live streams, and multi-platform strategies to stay relevant.
Lessons for Aspiring Creators
For those hoping to break through on TikTok, U.S. influencers provide a blueprint:
-
Authenticity Wins: Viewers value relatable personalities over polished perfection.
-
Consistency Matters: Posting regularly and engaging with followers fuels the algorithm.
-
Collaboration Expands Reach: Partnering with other creators can double exposure overnight.
-
Experimentation Leads to Virality: Many trends start with a single creative risk.
Pro Tip
Focus on a niche—whether comedy, cooking, or education—while allowing room for experimentation as trends evolve.
Conclusion: The American Stamp on TikTok’s Global Culture
In just a few years, U.S. influencers have taken TikTok from a lip-syncing novelty to a central force in entertainment, marketing, and even activism. Their ability to blend creativity with business savvy has reshaped the platform and influenced how billions of people engage with digital media.
As TikTok continues to evolve, the American creator community will remain a driving engine, setting trends and shaping conversations that reach far beyond the app’s short-form videos.
The message is clear: the USA hasn’t just joined TikTok—it has made it its own.
Helpful Links to Complement This Article
-
TikTok Creator Academy – Official resource for growing and monetizing your channel.
-
Pew Research Center – Social Media Fact Sheet – Data on how Americans use platforms like TikTok.
-
Influencer Marketing Hub – TikTok Statistics 2024 – Up-to-date stats on growth, demographics, and engagement.
Balancing Innovation, Privacy, and Human Dignity
Robotics and AI are reshaping adult entertainment—from interactive toys and automated camera rigs to AI-powered companions and smart chatbots. These technologies promise new creative possibilities and safer work environments for performers, but they also raise unique ethical questions. Designing ethical robotic systems for adult applications demands a deeper look at consent, privacy, and social impact.
1. Consent Must Be the Core Code
In adult content, consent is non-negotiable—and robotics must honor it at every stage:
-
Human-in-the-loop control: Performers should be able to start, pause, or stop a robotic device instantly and unambiguously.
-
Transparent data practices: Devices that record audio, video, or biometric feedback must clearly disclose what is captured and how it’s used.
-
Revocable agreements: Users and performers need easy ways to withdraw consent and have their data or recordings permanently deleted.
This level of consent protection should be written into software architecture, not just buried in legal disclaimers.
2. Privacy and Data Security Are Non-Optional
Adult tech often involves intimate user data—motion patterns, location, payment records, and more. Ethical development means:
-
End-to-end encryption and secure key storage to protect sensitive interactions.
-
Minimal data retention, keeping only what is necessary for functionality.
-
Independent security audits to ensure that vulnerabilities don’t lead to leaks or exploitation.
3. Avoiding Exploitation and Bias
AI-driven recommendation systems and robotic companions can unintentionally perpetuate harmful stereotypes or manipulate emotions:
-
Bias auditing: Data sets must represent diverse bodies, genders, and sexual orientations to prevent narrow or exploitative portrayals.
-
Transparent algorithms: Explain how recommendations are generated to avoid covert nudging toward risky or non-consensual content.
4. Performer-Centered Design
Robotics can enhance performer safety and income when built with their input:
-
Automated camera rigs and robotic lighting can reduce the need for large crews, giving creators more control over their environment.
-
Smart interactive devices can simulate experiences for remote audiences without physical risk to performers.
-
Fair monetization tools—like transparent revenue-sharing for AI-generated interactions—help ensure artists benefit from their likeness and labor.
5. Life-Cycle Ethics and Accountability
Responsible companies plan beyond launch:
-
Provide ongoing support and patching to fix security issues.
-
Create end-of-life recycling protocols for hardware to reduce e-waste.
-
Maintain clear lines of accountability so that harm isn’t shifted onto users or performers when malfunctions occur.
Bottom Line
The adult industry often pioneers new technology; it can also lead in ethical robotics. By centering consent, privacy, performer agency, and social responsibility, companies can deliver cutting-edge experiences without compromising human dignity.
Innovators who get this right won’t just avoid scandal—they’ll set the global standard for what responsible, intimate technology looks like.…